Refinishing hardwood floors yourself may seem simple, but small errors can ruin everything. Avoiding common mistakes can save time, money, and frustration.

Misjudging the Floor’s Condition Before Starting
Many DIYers begin hardwood floor refinishing without properly assessing the existing floor’s condition. A critical step that often gets overlooked is identifying hidden issues such as deep gouges, water damage, or uneven boards. These problems affect how well the new finish will adhere and how smooth the final surface will be.
Before sanding, carefully inspect the entire floor for discoloration or warping. Areas with significant damage may require patching or even board replacement. Skipping this step can result in uneven sanding and a finish that highlights imperfections rather than conceals them.
Using the Wrong Sandpaper Grit Sequence
Proper sanding is fundamental in hardwood floor refinishing, but many make the mistake of skipping the recommended progression of sandpaper grits. Starting with too coarse or too fine grit can damage the wood or fail to remove the old finish adequately.
A typical effective sequence starts with a medium-coarse grit (around 36-40), followed by a medium grit (60-80), and finishes with a fine grit (100-120) to prepare the surface for finishing. Each stage smooths scratches left by the previous grit. Rushing or skipping steps can leave visible scratches or uneven texture, which will be apparent after staining or sealing.
Ignoring Proper Dust Control Measures
Sanding hardwood floors creates fine dust that can settle on freshly refinished surfaces, causing rough patches or bubbles in the finish. A common mistake is neglecting dust management during and after sanding.
Using a sanding machine equipped with a vacuum attachment helps reduce airborne dust, but it is equally important to ventilate the space well and clean thoroughly between sanding stages. Wiping the floor with a damp cloth or tack cloth after the final sanding removes residual dust that can interfere with stain absorption and finish adherence.
Applying Stain Without Testing Color First
Many DIYers apply stain directly to the floor without first testing how the wood reacts to it. Hardwood species absorb stains differently, and the final color may vary widely depending on wood grain, previous finishes, and application method.
Before staining the entire floor, apply the chosen stain to a small, inconspicuous area or on a scrap piece of the same wood if available. This helps avoid unexpected results and allows adjustment of stain concentration or choice of product. Failing to do this test can lead to uneven color or a shade that doesn’t match the intended design.
Overusing or Applying Uneven Finish Coats
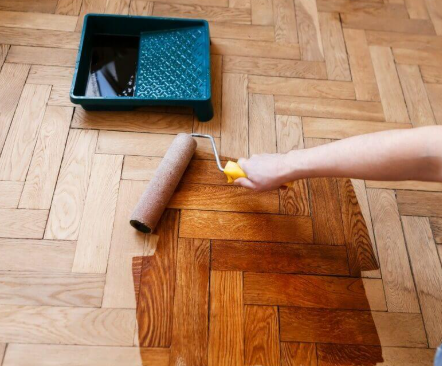
Applying too much finish at once or applying it unevenly is a frequent issue that impacts the durability and look of refinished floors. Thick coats can trap moisture and take longer to dry, leading to tacky surfaces or finish peeling over time.
The key is to apply thin, even coats and allow adequate drying time between each layer. Using quality applicators such as lambswool pads or foam brushes designed for floor finishes helps ensure smooth coverage. Applying multiple thin coats generally yields better results than fewer thick coats.
Neglecting to Allow Proper Drying and Curing Time
Another less-discussed mistake is underestimating the importance of drying and curing time. While finishes may feel dry to touch in hours, the floor continues to harden and strengthen over days or even weeks.
Walking on freshly finished floors too soon can cause dents, scratches, or streaks. Moving furniture or rugs before full curing can trap moisture underneath, leading to discoloration or damage. It’s advisable to follow manufacturer guidelines carefully and maintain good airflow during the curing period.
Not Preparing Edges and Corners Properly
Sanding machines effectively cover large open areas but cannot reach tight corners and edges. Many DIY refinishing attempts neglect these sections, leading to uneven appearance and finish gaps.
Using a hand sanding block or detail sander on edges ensures the entire floor has a consistent surface for staining and sealing. Overlooking this step results in obvious differences between the center of the room and perimeter areas.
Skipping Floor Cleaning Before Finish Application
Even after thorough sanding and dusting, small particles can remain on the floor. Applying stain or finish over dust or dirt compromises adhesion and leads to rough texture.
Cleaning the floor right before applying any finish with a vacuum and then a tack cloth or microfiber mop specifically designed to capture fine dust is critical. Some woodworkers recommend using a damp (not wet) microfiber cloth to trap remaining particles without leaving water spots.
Using Incompatible Products
Another nuanced mistake is mixing products that are chemically incompatible. For example, some oil-based stains or finishes don’t bond well if applied over water-based primers or vice versa.
Before buying and applying products, reading technical datasheets and confirming compatibility is essential. Mismatched products can cause peeling, bubbling, or discoloration that often becomes visible only after the finish dries.
Failing to Maintain Proper Temperature and Humidity
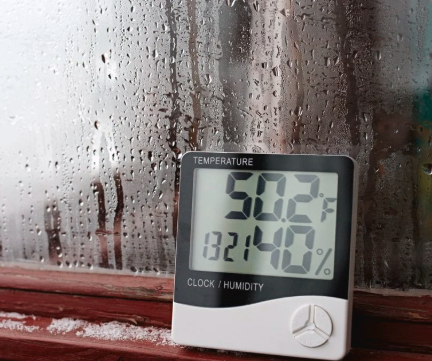
Environmental conditions affect the drying and curing of floor finishes. Applying stain or finish in rooms that are too cold, too hot, or too humid can result in problems such as blistering, slow drying, or uneven appearance.
Aim to work in temperatures between 65°F and 85°F (18°C to 29°C) and moderate humidity levels. Using fans or dehumidifiers to maintain stable conditions can improve results significantly.
Underestimating the Time Commitment and Physical Effort
Hardwood floor refinishing is physically demanding and time-consuming. Many attempt it on weekends without realistic expectations of the work involved.
Sanding floors, especially large areas, requires strength, patience, and multiple passes to achieve the right smoothness. Rushing through the process or working fatigued can lead to careless mistakes. Planning the project timeline carefully and pacing work over several days helps maintain quality.
Conclusion
Hardwood floor refinishing can transform a room’s appearance, but success hinges on attention to detail and avoiding common DIY mistakes. Understanding how to assess floor condition, sand correctly, control dust, and apply stain and finish properly improves results and durability. By preparing well and following informed steps, homeowners can achieve a professional-looking floor without unexpected setbacks.


